I decided to begin with a small, simple job first and work my way up.
 |
|
I cut the AdvantTech base to exact size on the table saw and
then used the table saw to trim the tongue off the first edge and the groove
off the last.
|
 |
|
I
followed that up with a pass across the jointer to produce a flat, smooth
surface.
|
 |
|
Then to
the sliding miter saw for careful trim of left edge.
|
 |
|
A quick
check of first two showed that the saw was cutting neither square or even
straight edges!
|
 |
|
So the
old Ryobi power miter box (bought when we applied trim in house 25 years ago!)
came out and produced perfect edges.
|
 |
|
A little
playing with available pieces yielded an acceptable layout.
|
 |
|
By
carefully looking at all available pieces, I was able to keep the scrap to an
incredibly small amount!
|
 |
|
I decided
to glue each course with Titebond III, a glue rated for outdoor use but to use
screws to produce the required clamping pressure while the glue set.
|
| I drilled a grid using my little B&D Lithium Ion pocket drill. |
 |
|
The
Titebond III instructions call for a generous application!
“The
bigger the blob, the better the job!”
|
 |
|
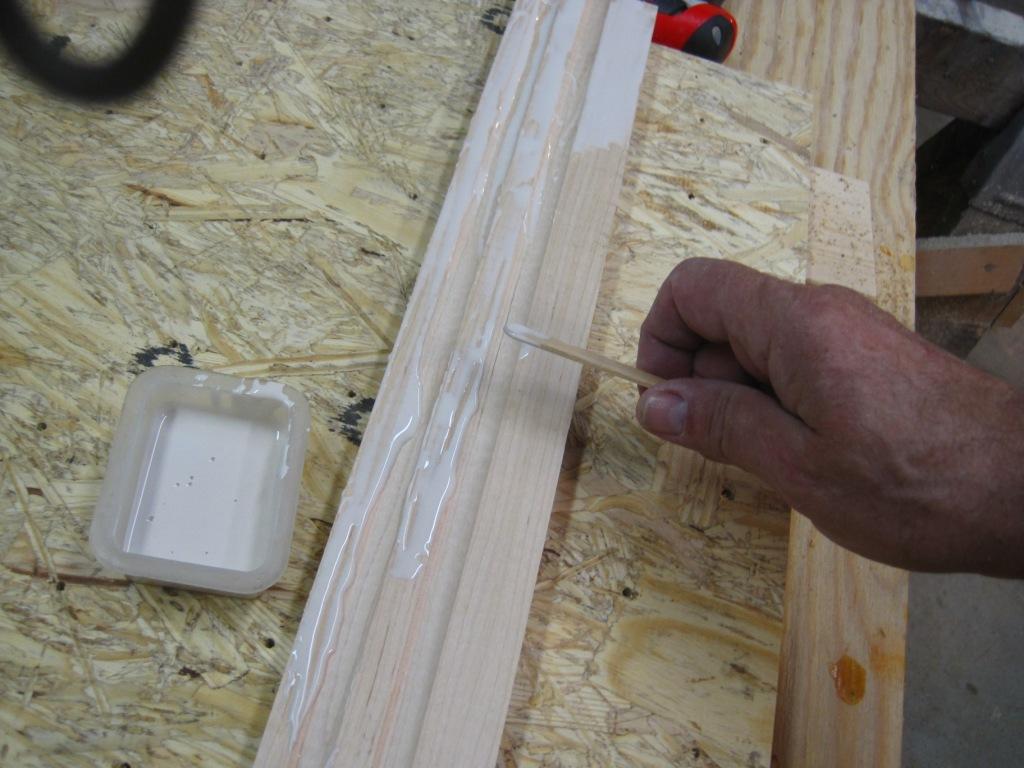
I have to
admit, I was a little nervous when I applied the glue to my first course. I use
orange sticks and learned that the glue is thin enough for a brush and the
orange stick would not be very good once I had to deal with tongue and groove
gluing.
|
 |
|
Wipe away excess glue with a damp cloth
|
 |
|
C-clamps
hold the piece in place while I . . . .
|
 |
|
Use my
3/8 Milwaukee
variable speed drill to seat the 1.25” fine thread drywall screws.
|
 |
|
Next
night, back for additional courses. Visited Home Depot and bought 6 acid
brushes, (so called because plumbers use these to apply acid to pipes prior to
sweating the fittings) for glue application.
|
 |
|
These
brushes worked very well indeed and the Titebond III was easy to apply.
|
 |
|
Edge and
end clamps hold the second course while I carefully invert the piece to apply
the screws in the back.
|
 |
|
While
adding the third course, the ends were not perfectly aligned but the piece
would not slide in the Titebond III! I wailed on it with my little rawhide
mallet to no avail. I finally broke out a 3/4” pipe clamp and brought it into
line.
After
edge and end clamping, I inserted the screws in the back but the front course
broke through the groove of the board (which would cause great difficulty in
applying the final course). So I backed the crews out (I’ll make the holes
vertical instead of a slight angle as I had planned – at least on the course of
holes closest to the groove edge of the flooring).
|
 |
|
As a
result, in a couple of places the maple flooring and substrate were clearly not “married” and a visible gap existed
between the substrate and the flooring. So I added a couple of pieces of
dimensional wood, lightly clamped at the back and more forcefully clamped at
the front where the gap was.
|
Worked
like a charm! But left me with a piece that had to stay in the clamp overnight.
Tomorrow,
drill second course of holes vertically and add final three courses of
flooring.
I am so
glad I decided to do this little roll-around cart top first since it allows me
to learn on a non-critical piece.
No comments:
Post a Comment